
Customizing your Personal Naming Service (PNS) within the Plena Super App enhances your user experience and helps personalize your digital identity. Editing your PNS is straightforward with the Plena Super App. Follow the steps below to update your PNS name efficiently.
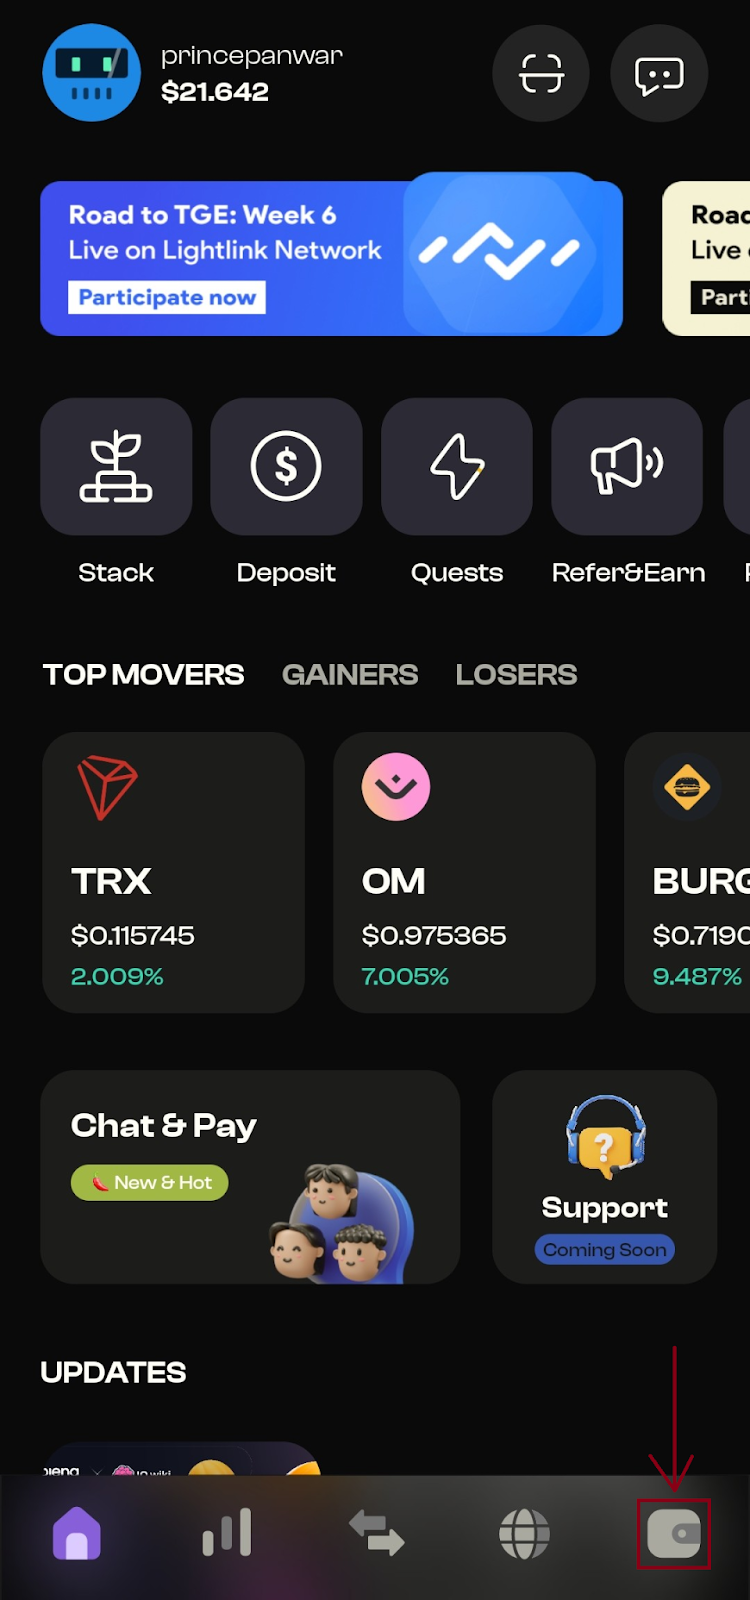
Step 1: Navigate to the Wallet Section
Open the Plena Super app on your device. Once the app is open, go to the wallet section. This is the main area where you manage your digital assets.
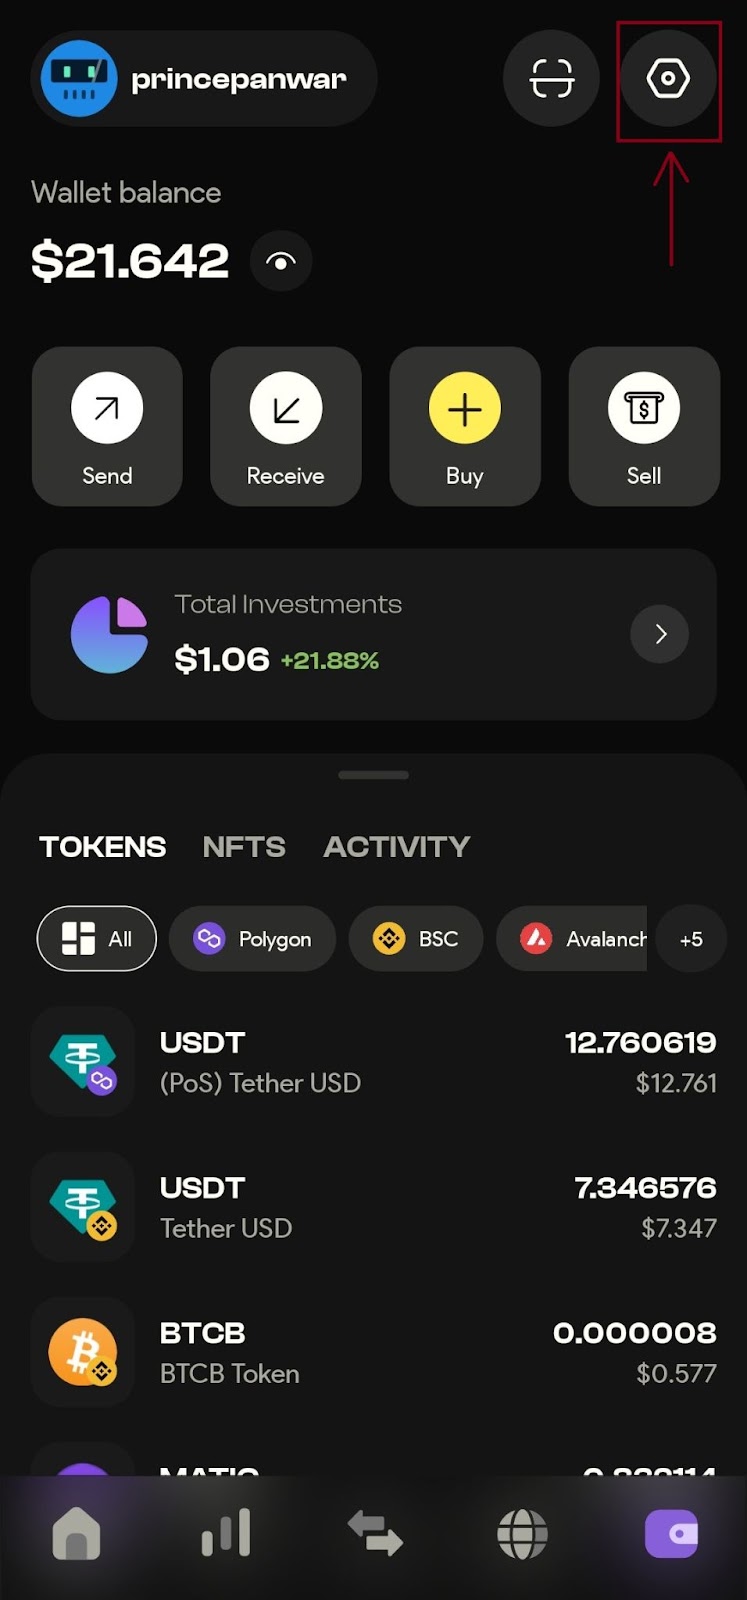
Step 2: Access the Settings Menu
In the wallet section, locate and click on the Settings icon. This will open the settings menu where you can adjust various preferences and settings related to your wallet.
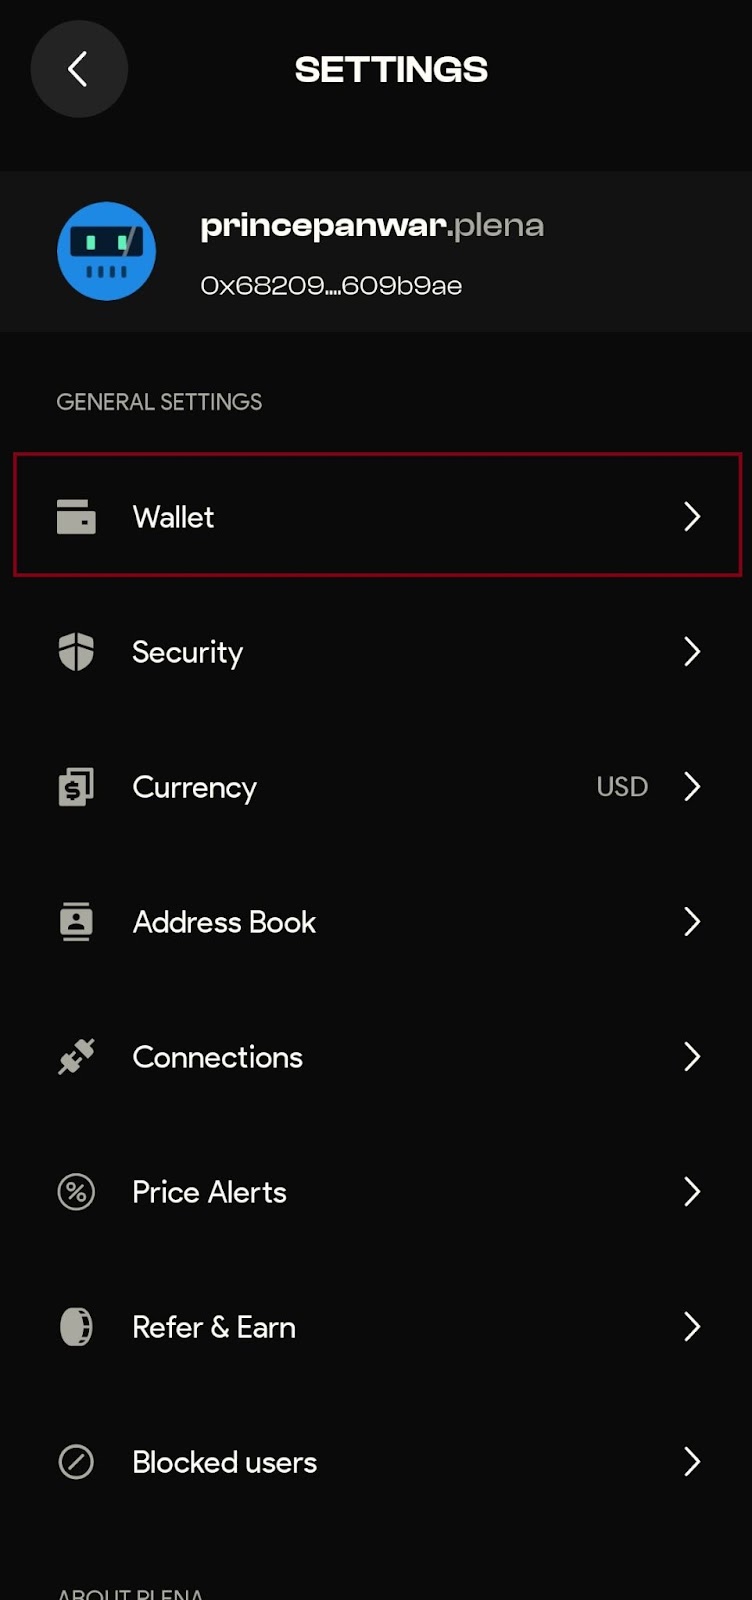
Step 3: Enter Wallet Settings
Within the settings menu, find and click on the Wallet button. This will take you to the wallet settings where you can manage specific details related to your wallet.
Step 4: Edit Your PNS
Inside the wallet settings, click on the Edit PNS button. This will open a new screen where you can update your PNS name.

Step 5: Update Your PNS Name
Type in your desired PNS name in the provided field. Ensure that the PNS name you want is not already taken. The app will typically indicate if the name is available. If the name is available, proceed by clicking on the ‘Update’ button to finalize the change.

Editing your PNS in the Plena Super app is a quick and straightforward process. By following these steps, you can easily update your PNS name to reflect your preferences. The Plena Super app ensures that managing your digital identity is both secure and user-friendly, allowing you to focus on leveraging the full potential of your cryptocurrency investments.


